Friday, 30 January 2015

Lesson: Cuts, Bruises, Scratches,Scars And Black Eye

 Products used:

Moulding wax( plasto)
Sealer
Cover top of latex-> make fleshy
Puss
Dirt
Red eye drops
Kryolan crimson
Palette knife
Hairdryer
Spatula
Pin
Wound filler
Blood
Typlast
pipette


 Bruise/ Black eye

->super colour or eyeshadow
->no hard edges
->to blend better you can use moisturizer
->before you do the bruise think about how old it is supposed to be


 I also did some bruises on myself (practice at home)


Those bruises are supposed to be already a couple of days old. The center of the bruise is not that dark anymore and the older bruises get the more they turn yellowish green.

->when you do a black eye apply the make up first (if person is supposed to wear make up)
->don't powder a black eye
->apply Vaseline to make it look shiny and swollen


 Split lip

->using Colodium
   

·   -> Apply barrier cream/foam first! Rub it in where you gonna put it
·   -> Apply colodium, tilt head slightly back and put a good amount on it
·   -> Have hairdryer ready
·   -> Use something to create a scar, like a palette knife, and dry it
·   -> While creating the scar with palette knife press that part of lip together
·   -> Add another layer
·   -> Create a keloid effect

·   -> Typlast, can literally make scars with it, if it is too shiny powder it up, can peel them of easily

I haven't done a split lip using Colodium but I did light scars using Typlast.


Wounds/ Cuts

Glue for wax or without
Cut and mould before
Moulding wax
You cover it with sealer, have to cover wax before colouring
Latex
Then colour it
Depth in cut-> then apply blood
How old is cut?-> new cut has light coloured blood
Don’t powder
You can use fixing spray before you apply the blood
Do wound first before applying make up


->don’t add any blood/water/fluids until actor is on the floor or right position
->water/blood has to drop/fall from the person, way of falling has to be natural
->do research about it!
->old wounds/scaring, typlast ,non- flexible colodium-> put barrier under colodium

Steps for making a cut/wound

Get wax and put it on the back of your hand, make it a bit smoother-> like icing butter
Layer it up on wrist
Blend the edges out really nicely, use moisturizer or cleanser to help blend
Wipe excess wax off 
Slit it, make a cut
Now you can cover it with latex or sealer
When covering with latex blend out properly!
Have to work quickly otherwise you will pick it up again
Dry with hairdryer (until transparent)
Use a pin and start picking it up, make wound look more realistic
Now can match skin-color
Wound filler, use pin or spatula , then put it into the wound, you could also use a brush to do it, make sure the wound filler is really in-> don’t want it to fall out, built up texture, think about detail
Use stipple sponge and blood to create redness
No hard edges
Dip it into wound
Gloss gives it a more 3D effect

I did a cut on the wrist


HD

What is High Definition Broadcasting and how does it affect 

make up and hair artists?


 HDTV(High Definition Television) is is a format for digital television transmission, which can display a resolution from 720p to 1080i. This results in very clear, sharp and almost real life images we see on TV. A lot of broadcasting station offer now also they programs in HD and it becomes more and more the standard. But to receive HDTV you need as special receiver which a lot of people who have older TV models don't have. Means they have to upgrade to HD TV's. And analog TV starts to disappear. Therefore HDTV is the format with the highest quality we have at the moment. But having the highest quality also brings sides effects with it when it comes to make up and hair on TV or anywhere a HD camera is being used. The good thing about analog TV was that it was shot in a special(lower format) so you couldn't see any wrinkles, scars, blemishes or generally the heavy make up which was necessary to give the person the perfect skin. But now with HDTV yo can see every little spot, every line that is wrong or even if the make up artist used too much powder. It is all visible. Which gives all the make up artist and hairstylists a big headache. Therefore make up artist should work on they applying techniques, like blending and buffing the foundation in very well so you won't be able to see it that much. They should also check they work on camera after doing a test shoot maybe, because then they can still work on the things that are too obvious. With the rise of HDTV a few make up brands offer now also HD make up. For instance has Kryolan a HD series which offers HD foundation and powder(click here to see their range of HD products). Smashbox also offers a photo ready/ finish series which I guess can also be used for HDTV (smashbox website). I have also seen drugstore brands offering HD make up but I doubt that they will that good. I am not saying drugstore brands are not good just that I doubt that you get a good result when working in the HD environment. Airbrushing now also used when working with HD cameras because it makes the skin look more smooth. 


"Airbrush provides a way of depositing base onto the face through a conical spray pattern
of thousands of tiny dots or “pixels” at a very low pressure that gently overlaps on skin,
and from a distance the eye perceives it as a smoother, natural looking complexion.
Some skin discolorations and imperfections, scars, and puffiness are visually blended out
more successfully under airbrush makeup. Depending on the micronization of the
pigment contained in the airbrush product, these tiny “pixels” of base on skin gives
somewhat the same effect as what the digital camera sees, and the natural tone of the
talent’s skin comes through giving a smoother and natural looking appearance."( 2009 by Creative Artistry & FX)


I think when it comes to hair, you have to be careful that everything is in place and that there is nothing poking out. Also maybe the use of products. I could image that it is maybe visible if you spray too much hairspray or if you use dry shampoo. 

Some brands that offer HD make up

Make Up For Ever Professional Paris


Kryolan


Smashbox


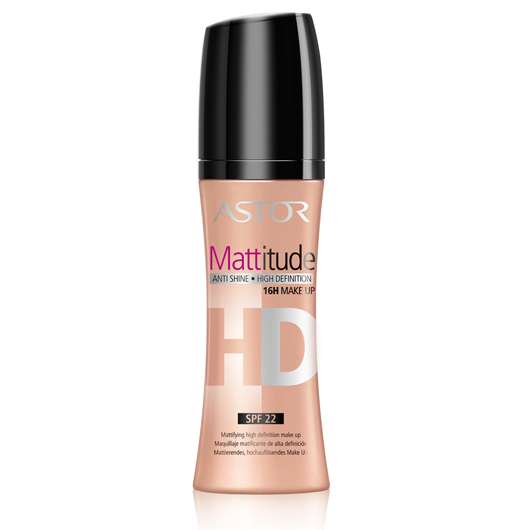
Astor


NYX


p2

Monday, 26 January 2015

Existing portrayals of Miss Havisham character

 There have been several TV series/ film and theater adaptions of the novel 'Great Expectations' by Charles Dickens. In this post I want to concentrate on the different Miss Havisham portrayals.

1946, Great Expectations

This version was directed by David Lean and had Martita Hunt starring as Miss Havisham. Responsible for the make up were George Blackler and  Ernest Gasse. For the costume department was Sophie Denne responsible.

Miss Havisham, played by Martita Hunt, in the 1946 film.

1974, Great Expectations

Directed by Joseph Hardy and Margaret Leighton was starring as Miss Havisham. Costume designers were Joan Bridge and Elizabeth Haffenden.

Miss Havisham, played by Margaret Leighton, in Great Expectations in 1974.

1981, Great Expectations

BBC TV miniseries directed by Julian Amyes and Joan Hickson as Miss Havisham. Make uo artist for this series was Gwen Arthy.

Joan Hickson as Miss Havisham in Great Expectations in 1981.

1989, Great Expectations

Miniseries with 6 episodes which was directed by Kevin Connor and starred Jean Simmons as Miss Havisham. Eithne Fennel was chief hair stylist and Eddie Knight key makeup artist.

Jean Simmons, played Miss Havisham in Great Expectations in 1989.

1998, Great Expectations

Avery modern version of the novel directed by Alfonso Cuarón. Anne Bancroft starred as Mrs. Nora Dinsmoor. In this version they changed Miss Havisham's name into Mrs. Nora Dinsmoor. 
Make up artist were Vivian Baker, Manlio Rocchetti, Cecilia Verardi and Linda Kamp. Anthony Veader, Ilona Herman and Angel De Angelis worked as hair stylist on set.

Anne Bancroft played a character called Ms. Dinsmoor in a modern version of Great Expectations, set in New York, in 1998.

1999, Great Expectations

BBC; directed by Julian Jarrold and won the BAFTA award. Charlotte Rampling was starring as Miss Havisham in this version. Make up artist were Nicola Matthews, Fran Needham and Eve Wighall.

Charlotte Rampling as Miss Havisham in Great Expectations in 1999.

2011, Great Expectations

BBC, TV miniseries with 3 episodes. It was directed by Brian Kirk and had Gillian Anderson starring as Miss Havisham and Douglas Booth as Pip. I am just going to mention all of the make up artist and hair stylist because there are a lot. Luca Saccuman, Darlene Forrester, Luisa Ridge and Sian Wilson were one of the hair stylist on set. As make up artist worked Nicky Lissner, Adele Firth, Roo Maurice, Kristin Chalmers and Chris Lyong.


2012, Great Expectations

directed by Mike Newell and is starring Robbie Coltrane, Ralph Fiennes and Helena Bonham Carter as Miss Havisham (yay Harry Potter cast ^^ ϟ 9¾ ) . As make up artist were working Amanda Rudkin, Zoe Clare Brown and Sally Rose Davidson. Marc Pilcher and Jenny Shircore were the hairstylist on set.


2013, Great Expectations

West end adaption directed by Graham McLaren and written by Jo Clifford. Paula Wilcox played the role of Miss Havisham. Costume designers were Graham McLaren, Annie Gosney and Giovanni Bedin.

Great Expectations at the Vaudeville theatre.

Looking at all the different portrayals of Miss Havisham through the decades I have to say I like the ones from 1999, 2011, 2012 and 2013 the most. Because in the older versions Miss Havisham looks more like a normal old women which I find is too boring and not that accurate if you base them upon the novel. Miss Havisham was seen as a kind of crazy women after she has been dumped by her fiance on the day of their wedding  and for me the older versions don't really portrait the craziness, sadness and longing for love. I like the 2012 version simply because well I am biased :). I totally love Helena Bonham Carter but I also liked the version because she looks quite insane there and for me portrays Miss Havisham quite well. Her character also gave me ideas for my own designs. In the 2011 version I think they portrait Miss Havisham quite realistic which I also like a lot. Realistic in the sense of  what happens if you have lack of sunlight and nutrition's. How your skin looks like if you don't go outside and get fresh air, all those things. You can see that on how her skin looks like as well as her very dry and bitten lips. Also something I found very interesting is that she looked liked she had some anxieties/ psychological problems which were displayed through her having shaky hands. What I like about the west end adaption starring Paula Wilcox is, that is more contemporary, for example she is wearing black lipstick. But even though it is more modern she displays Miss Havisham still very good. She looks like a crazy woman:). In a good way:) Charlotte Rampling which is playing the role of Miss Havisham in the 1999 version does not look like the crazy and insane Miss Havisham, just the opposite she looks very natural. But I think she looks also beautifully sad in the images. She has also a very longing gaze in the first image which shows her longing for love even if she appears to be crazy and cold hearted.

Saturday, 24 January 2015

Mid/Late Victorian Hairstyles: 1860 - 1890


Key points:

~hair was still centre parted
~smooth front
~plaited or curled into chignon (were low in the back)
~use of artificial hair
~dark hair was desirable during that time, so women with light hair had to dye their hair if they wanted to follow the trend
~wavy hair became fashionable
~later the hair was placed higher on the head
~flowers as accessories
~cascades of ringlets/curls were coming down, as well as having ringlets at the neck area
~the hair moved from the sides to the back
~during late mid Victorian era the chignon became unpopular again
~during the late Victorian times the hair became bigger
~if you had a fringe it was tightly curled at the front

Victorian Hair Designs

Autres coiffures Victoria et Elizabeth

use of artificial hair to elaborate the hairstyle
http://mute-the-silence.blogspot.com/2011/12/victorian-hair-styles.html?m=1

hairstyles from TV adaptions

the more late hairstyles including the tight curled fringe

http://mute-the-silence.blogspot.com/2011/12/victorian-hair-styles.html?m=1

Photograph Of Victorian Woman Wearing A Hair Comb Similar To The Gilded Brass Peigne Josephine Style Hair Comb

and an overview from the several hairstyles from the early to late Victorian times

Victorian Hairstyles A collection of Victorian photographs ranging from 1855 - 1880’s.

I think you can see that the hair became more bigger ,curly and just overall more elaborate as the century progressed. It started with the innocent looking buns and plaits at the sides and moved to the big curly hair. Even though the middle parting stayed at all times the hair became more loose as time progressed. Also especially during the mid/late Victorian times they used a lot more accessories in the hair and of course the artificial hair (already made ringlets, which you just have to pin in).

Friday, 23 January 2015

Lesson: Ageing

Health and Safety:
wash you hands
ask your model if she has any allergies?
is your model wearing contact lenses?
have a clean working space
cover up your model you don't want to ruin the clothes
pin back the hair so the model won't get any of the products into her hair
there is a special remover for tooth enamel(name?)


What is to consider before you start the ageing process?
Which age are you doing?
What is the background of the portrayed person?
In which period is the story set?


Products used:
  • baby buds
  • cotton pads
  • brush kit
  • spatula
  • black stibble sponge
  • Kryolan foundation palette
  • Kryolan supercolur palette
  • hair dryer
  • latex
  • old age stipple
  • hair dryer
  • disposable mascara wands
  • tooth enamel
  • barrier cream

Theatrical Ageing ( face)
Steps:
  • make sure face is clean
  • apply foundation using the Kryolan foundation palette
  • don't powder after applying the foundation because you keep working with supercolour
  • ask the model to frown so you can see where her natural wrinkles and frowning lines are
  • then I mixed a brown with some red to create a redish brown and used a small brush and went into these lines, do also lines around mouth (when ageing the mouth lines tend to go down), eyes,the lines going down from the nose to the mouth(find out the name!)
  • start with applying only a bit of colour and then build up, keep looking in the mirror so you can see the process and if it looks real
  • to give the eyebrows and ageing look a put some white supercolor on a disposable mascara wand and brushed it through the eyebrows
  • then take the black stipple sponge(with smaller pores) and go into the dark red supercolour and stipple it on the cheeks to create those fine ,small veins
  • my model is supposed to portray a drinking, smoking person with a bad lifetyle so I also added black and yellow tooth enamel
  • you can also create some dark circles underneath the eyes


Creping of the skin on hands

Steps:
  • first apply the barrier cream on the hand
  • wait until it is dry
  • then stretch the skin of the hand and apply the old age stipple with a sponge
  • dry the old age stipple with a cool hairdryer 
  • at this point you can decide if you want to build up some more layers, just do the same as before
  • when dry move the skin of you hand so it will get wrinkly
  • if needed match the skin colour
  • you can easily peel of the old age stipple or remove it with lukewarm water.


-> I didn't match the skin colour after applying the old age stipple.
-> should definitely practice again and also match the skin colour the next time